
The excitement of the next coming spring is unparalleled for gardeners and nature lovers alike. Getting to plan your future gardens is a fun winter time activity, and a little extra planning you can set yourself up for a successful gardening season. Part of that planning is making sure you have proper seed starting supplies, here I’ll be sharing my master list of tools needed to successfully start seeds indoors.
1. Seed Starting Trays and Containers
If you have spent anytime on the internet or social media when dealing with the gardening/homesteading world during seed starting season, you will quickly see that seed starting trays and containers are becoming big business for influencers all over. It seems everyone is designing their preferred version of seed trays. In my eyes it is turning into too many options for new gardeners to choose from. I’ll talk about a few of the most popular styles and what kind of gardeners they would work well for, starting with the ones I personally use.
Soil Blocks
A sustainable of option where you are using a tool to basically compress seed starting mix into small blocks.
The perks: it cuts down on plastics, and is easy for anyone to use. The tools are relatively inexpensive and last for years, the soil is easy to tell if it needs watering.
The downfalls: they are time consuming to make many blocks at a time compared to other methods. If not carefully bottom watered the soil blocks (especially the smallest size) is prone to falling apart. It can also be challenging to find soil that is a good fit for soil blocking, some potting mixes have too many large pieces in them, but you can always screen the soil before hand.

Cell Trays
These are usually the most common trays that you will see at garden supply stores. They are plastic the cells come in different sizes and shapes ~ but the trays themselves are usually a common 1020 tray which is 10″x20″. Using the universal size is helpful if later on you want to but different supplies like the solid trays for bottom watering, or humidity domes.
The perks: These are usually the cheapest option to get, they come in many different sizes to fit what ever kind of plants you want to grow, they are easy to fill with soil (just make sure you put some pressure down to make sure there isn’t air pockets after filling with soil). The uniformity in size and the extra trays you can purchase to put underneath, make them easy to carry and move around for hardening plants off, or if you are like me and you move them outdoors in a greenhouse at times.
The downsides: Obviously we all know that plastic on our planet is an issue and these trays just add to that. They are reusable, but they still breakdown over the years and will eventually need to be replaced. You need to be careful where you purchase them from ~ I have tried getting cheap options on amazon but the plastic is too thin and flimsy causing the trays not to sit level and it creates watering issues over time. Be sure to use a reputable company like Johnny’s or Farmer’s Friend.
Row Trays
These I guess fall under the style as cell trays, but they are a personal style that I use that I buy from Johnny’s Select Seeds. The long rows make it easy to sow many seeds of the same variety together to save space in my germination area, then they are separated and put into larger containers later on. I would say this is mainly a good option if you are sowing many seeds of certain varieties. I generally start hundreds of tomatoes for our spring plant sale, and these trays make my life much easier. The downsides would be the same as the other cell trays, though if you purchase through Johnny’s you will not need to worry about quality! (I am not being paid to say this 🙂 )
DIY Containers
There are so many different ways to reuse and recycle things around your home to make DIY containers. If you want to save money or just have recycling as a high priority it can be fun to come up with different ideas. We have experimented with different things like: egg cartons, yogurt containers, toilet paper rolls, homemade newspaper pots, fruit containers from the grocery store etc.
The main things you need to consider are water drainage, how the container will hold up over time, and if it is a safe product for your seedlings to grow in.
The pros: This option can be free with a little time cleaning or poking drainage holes. It’s less wasteful.
The downsides: Containers like egg cartons will dry out your soil very fast it is underwatered and will stay sopping wet if overwatered, potentially causing moisture issues. Little individual containers can be very time-consuming to make and to fill with soil.
This is just a few of the main options when it comes to seed starting. There are also peat pots, cow pots and biodegradable grow bags, and more as options.
2. Seed Starting Mix or Potting Soil
As with most things in gardening…there are a lot of choices when it comes to soil. Do not just go out to your yard and grab soil from the ground to fill your seed trays. That soil is filled with weed seeds, potential bugs and depending on your soil type ~ your seedlings will not thrive. Get to the store or online and choose from seed starting mix or potting soil. There is one main difference between the two, and that is the nutrients added or lack there of!
Seed Starting Mix is a sterile medium that is ultra fine, light and well draining that has no added compost or nutrients. It is used strictly for just germinating seeds and getting seedlings to sprout, where the plant is only using the energy that is stored in the seed itself. Once the plant starts to grow, for the best results, you need to plant them outside if the weather allows or “pot up” the plants into a new container that has potting mix.
Potting mix on the other hand is not sterile, it has the potential to hold fungus and twigs, but it also includes the compost that your growing plants need longer term for nutrients. I personally always start my seeds in potting mix, this is because I start so many different trays at a time ~ and I don’t have the free time to be constantly potting up into a new soil. My one tip would be to pick out any large pieces of sticks or bark because they can take up a lot of space in a little cell tray. You can make your own little strainer out of hardware cloth to help sperate the larger material.
Even though I kind of want to gate keep my favorite potting soil since it can be hard to get in my area at times, I won’t keep it a secret. I personally use the Organic Pro-Mix and have been having wonderful luck with it for years. If you are local to me the only place I have been able to find it is Menards!
** An Extra Caution Note** In more recent years, many gardeners around the country have had their soils accidentally contaminated with PFAS (Polyfluoroalkalyl substances) otherwise known as “Forever Chemicals” they have been used since the 1940’s in many different industrial ways, but are now finding their way into soil, and they can cause so much damage to plant growth. This could be a whole blog post on it’s own, maybe it will be at some point. Do a little research for yourself and do your best to keep these forever chemicals out of your gardens!
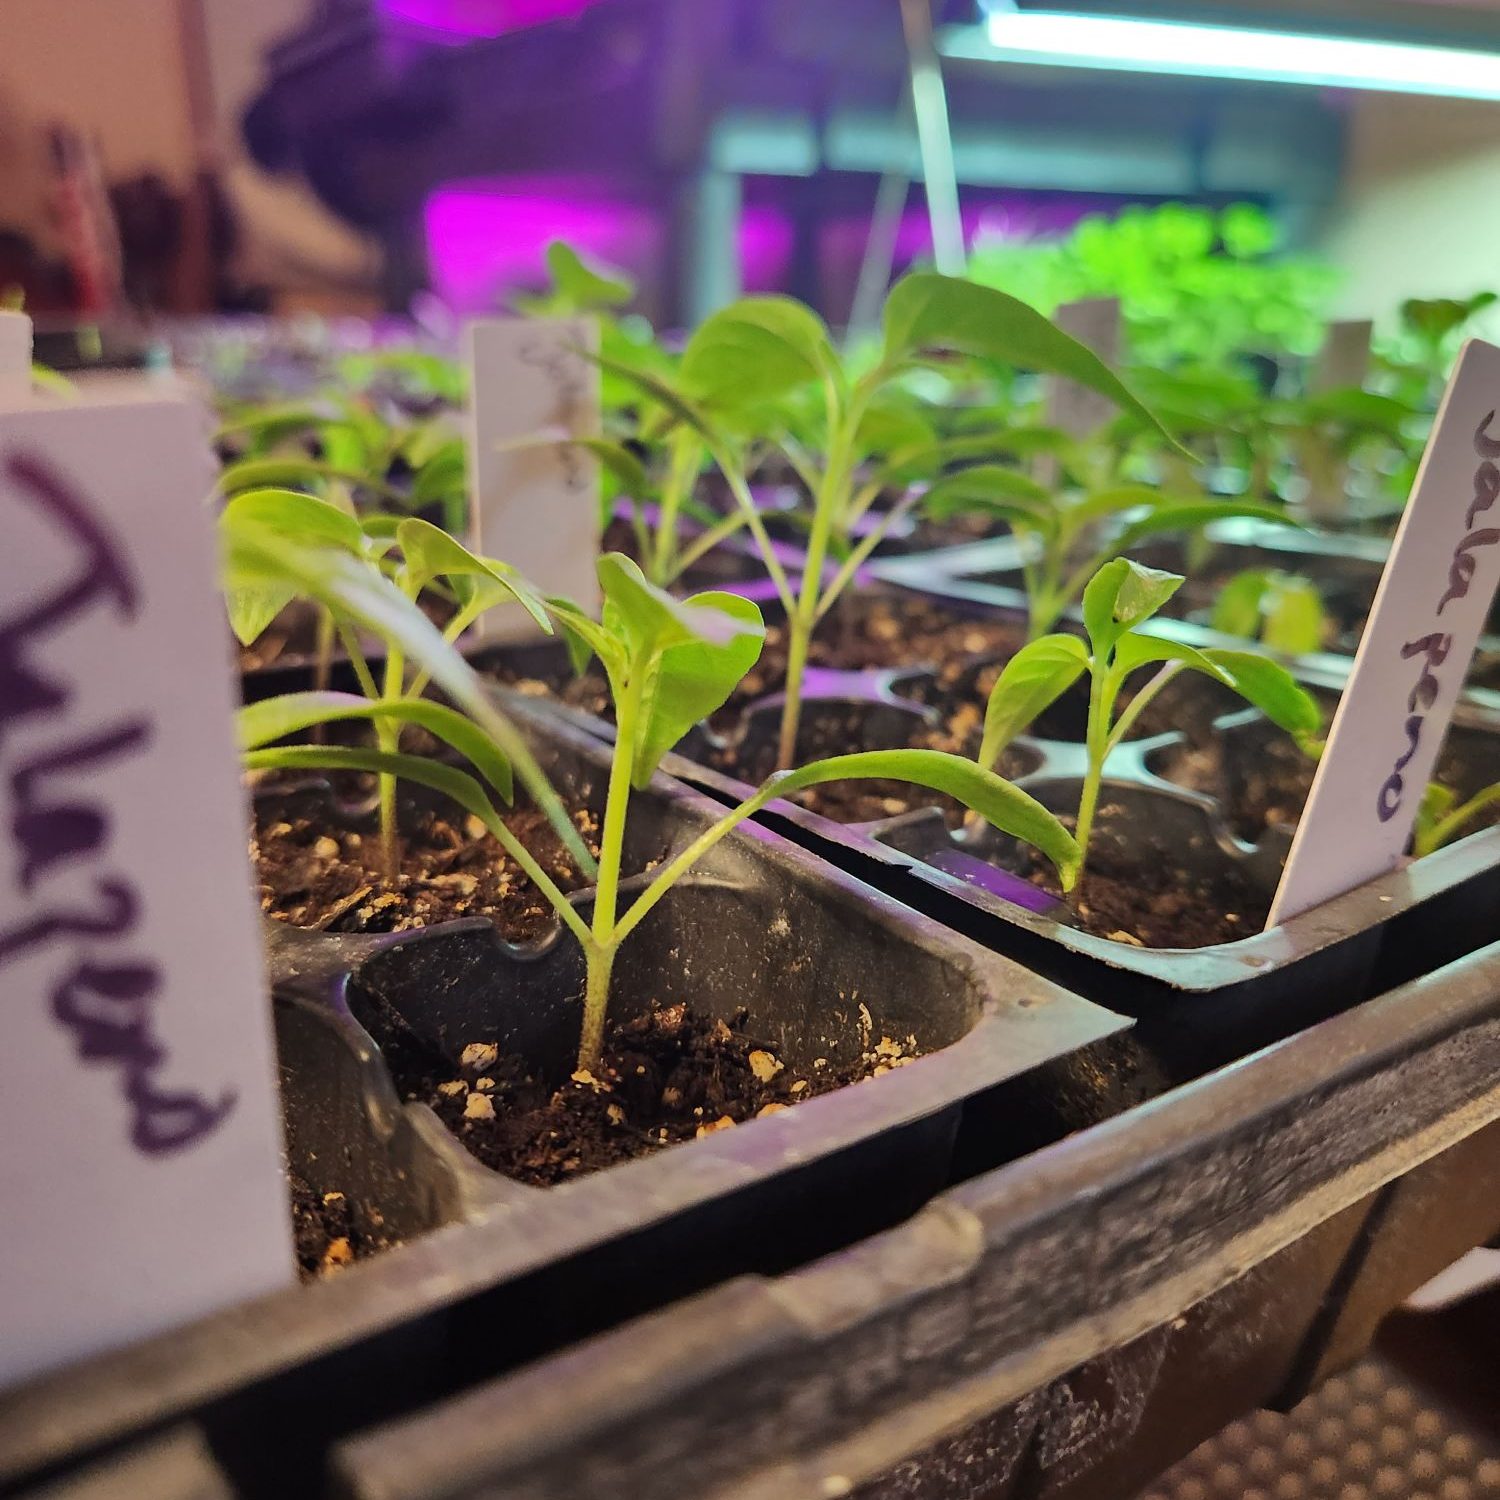
3. Grow Lights
Of all the tools need to get seeds off to a great start ~ grow lights make the largest difference for thriving plants! Yes, I personally years ago, was able to successfully start many seeds in my large living room window that is south facing with lots of available light. It worked….just enough. But many of my plants were long and spindly with weak stems (gardeners call that, Leggy).
Grow lights are used to give plants access to the full spectrum of light they would otherwise have access to in nature. These lights can be LED or fluorescent, you can get as into the science as you want to, but basically plants need different spectrum of color for different growth stages. Blue light helps with growing the plant structurally and the red light spectrum helps with producing flowers, fruit, and the growth of new foliage. There are many options online, and believe me when I say I have successfully started plants with a plain old fluorescent shop light. The downside with those is that you must be careful to not overheat the plants, the light must be close enough, but you may need fans to keep plants cool.
Keeping lights at the proper distance will help grow strong plants. With LED lights with higher watts, it is generally recommended to keep lights higher above plants. Fluorescents however, have to be much closer. Lights vary so much in style that there is no strict rules, and by keeping a close eye on how your seedlings you will soon identify if you need to move your light closer or not.
4. Watering Tools
Watering may seem easy, grab a watering can and go for it, right? The downside to starting plants indoors is that you then have to deal with the excess water that will drip from your seed trays or containers. In the first section of this blog we talked about cell trays, one of the extra things you can purchase to go along with them is the solid 1020 trays. These are solid plastic trays that can catch the extra water if you are watering from the top of the trays. To help avoid moisture or mildew issues, many gardeners choose to “bottom water”. Bottom watering is where you gently fill the solid tray or container that is beneath the cell trays. The holes in the bottom cell trays will allow the soil to syphon the water up to the plant roots, without exposing the leaves to water. Either way you decide to water you will want to pour off the extra water caught in the trays or a container. This will make sure not to damage shelving that you are using, or if you are using wire shelving with grow lights, it will not drip water onto your lights.
Besides the trays, another watering tool you need if you are not bottom watering, is something to actually water the plants with. I personally love using spray bottles when the seeds are just germinating, it is an easy way to make sure the soil is staying moist enough, without flooding trays and mistakenly washing seeds away.
5. Heating Mat
In all honesty, my Mom just bought me my first heating mats 1 year ago! I have been successfully starting seeds at home for years and really didn’t feel like with the success that I was having, warranted buying more products and then have the headache of dealing with more wires and outlets. There is one plant that I grow many of every year that made it seem worth it, and that was Peppers! Peppers always took so long to germinate and sprout for me because they were not warm enough in my cold basement! They eventually would, but heating pads had them sprouting in days instead of weeks. If you are going any seeds that take a long time to germinate, they just might be worth the money!
6. Ventilation
This is the hack that I share all of the time with new gardeners trying to master seed starting. Fans! Have enough fans that all of your seedlings are being hit with a decent amount of airflow. Only use the fan after the germination phase is done and you have seedling that have emerged from the soil. This not only will help with any potential mildew issues on the soil surface, or on the plant foliage itself, but it will also help grow stronger plants. Fans simulate wind which will help grow stronger stems that can handle the real deal once they are transplanted out into the actual garden. I have also noticed that having fans helps limit how leggy (long thin stems, reaching for light) plants will get if you do not have the proper lighting for them indoors. This can be as simple as an oscillating fan set to blow back and forth across your grow space.
*** Note: If you have already starting your seedlings and are just now seeing the fan tip, start slowly. If you put a fan on high ~ it is like tossing a stop sign into a hurricane. You will snap stems….and if you’re like me….maybe shed a tear or two. Start slow and day after day bump the speed of your fan up. Also… If you are just turning on the fan now, it will change how quickly your plants dry out. Keep a close eye on them until you get the new watering schedule figured out! ***
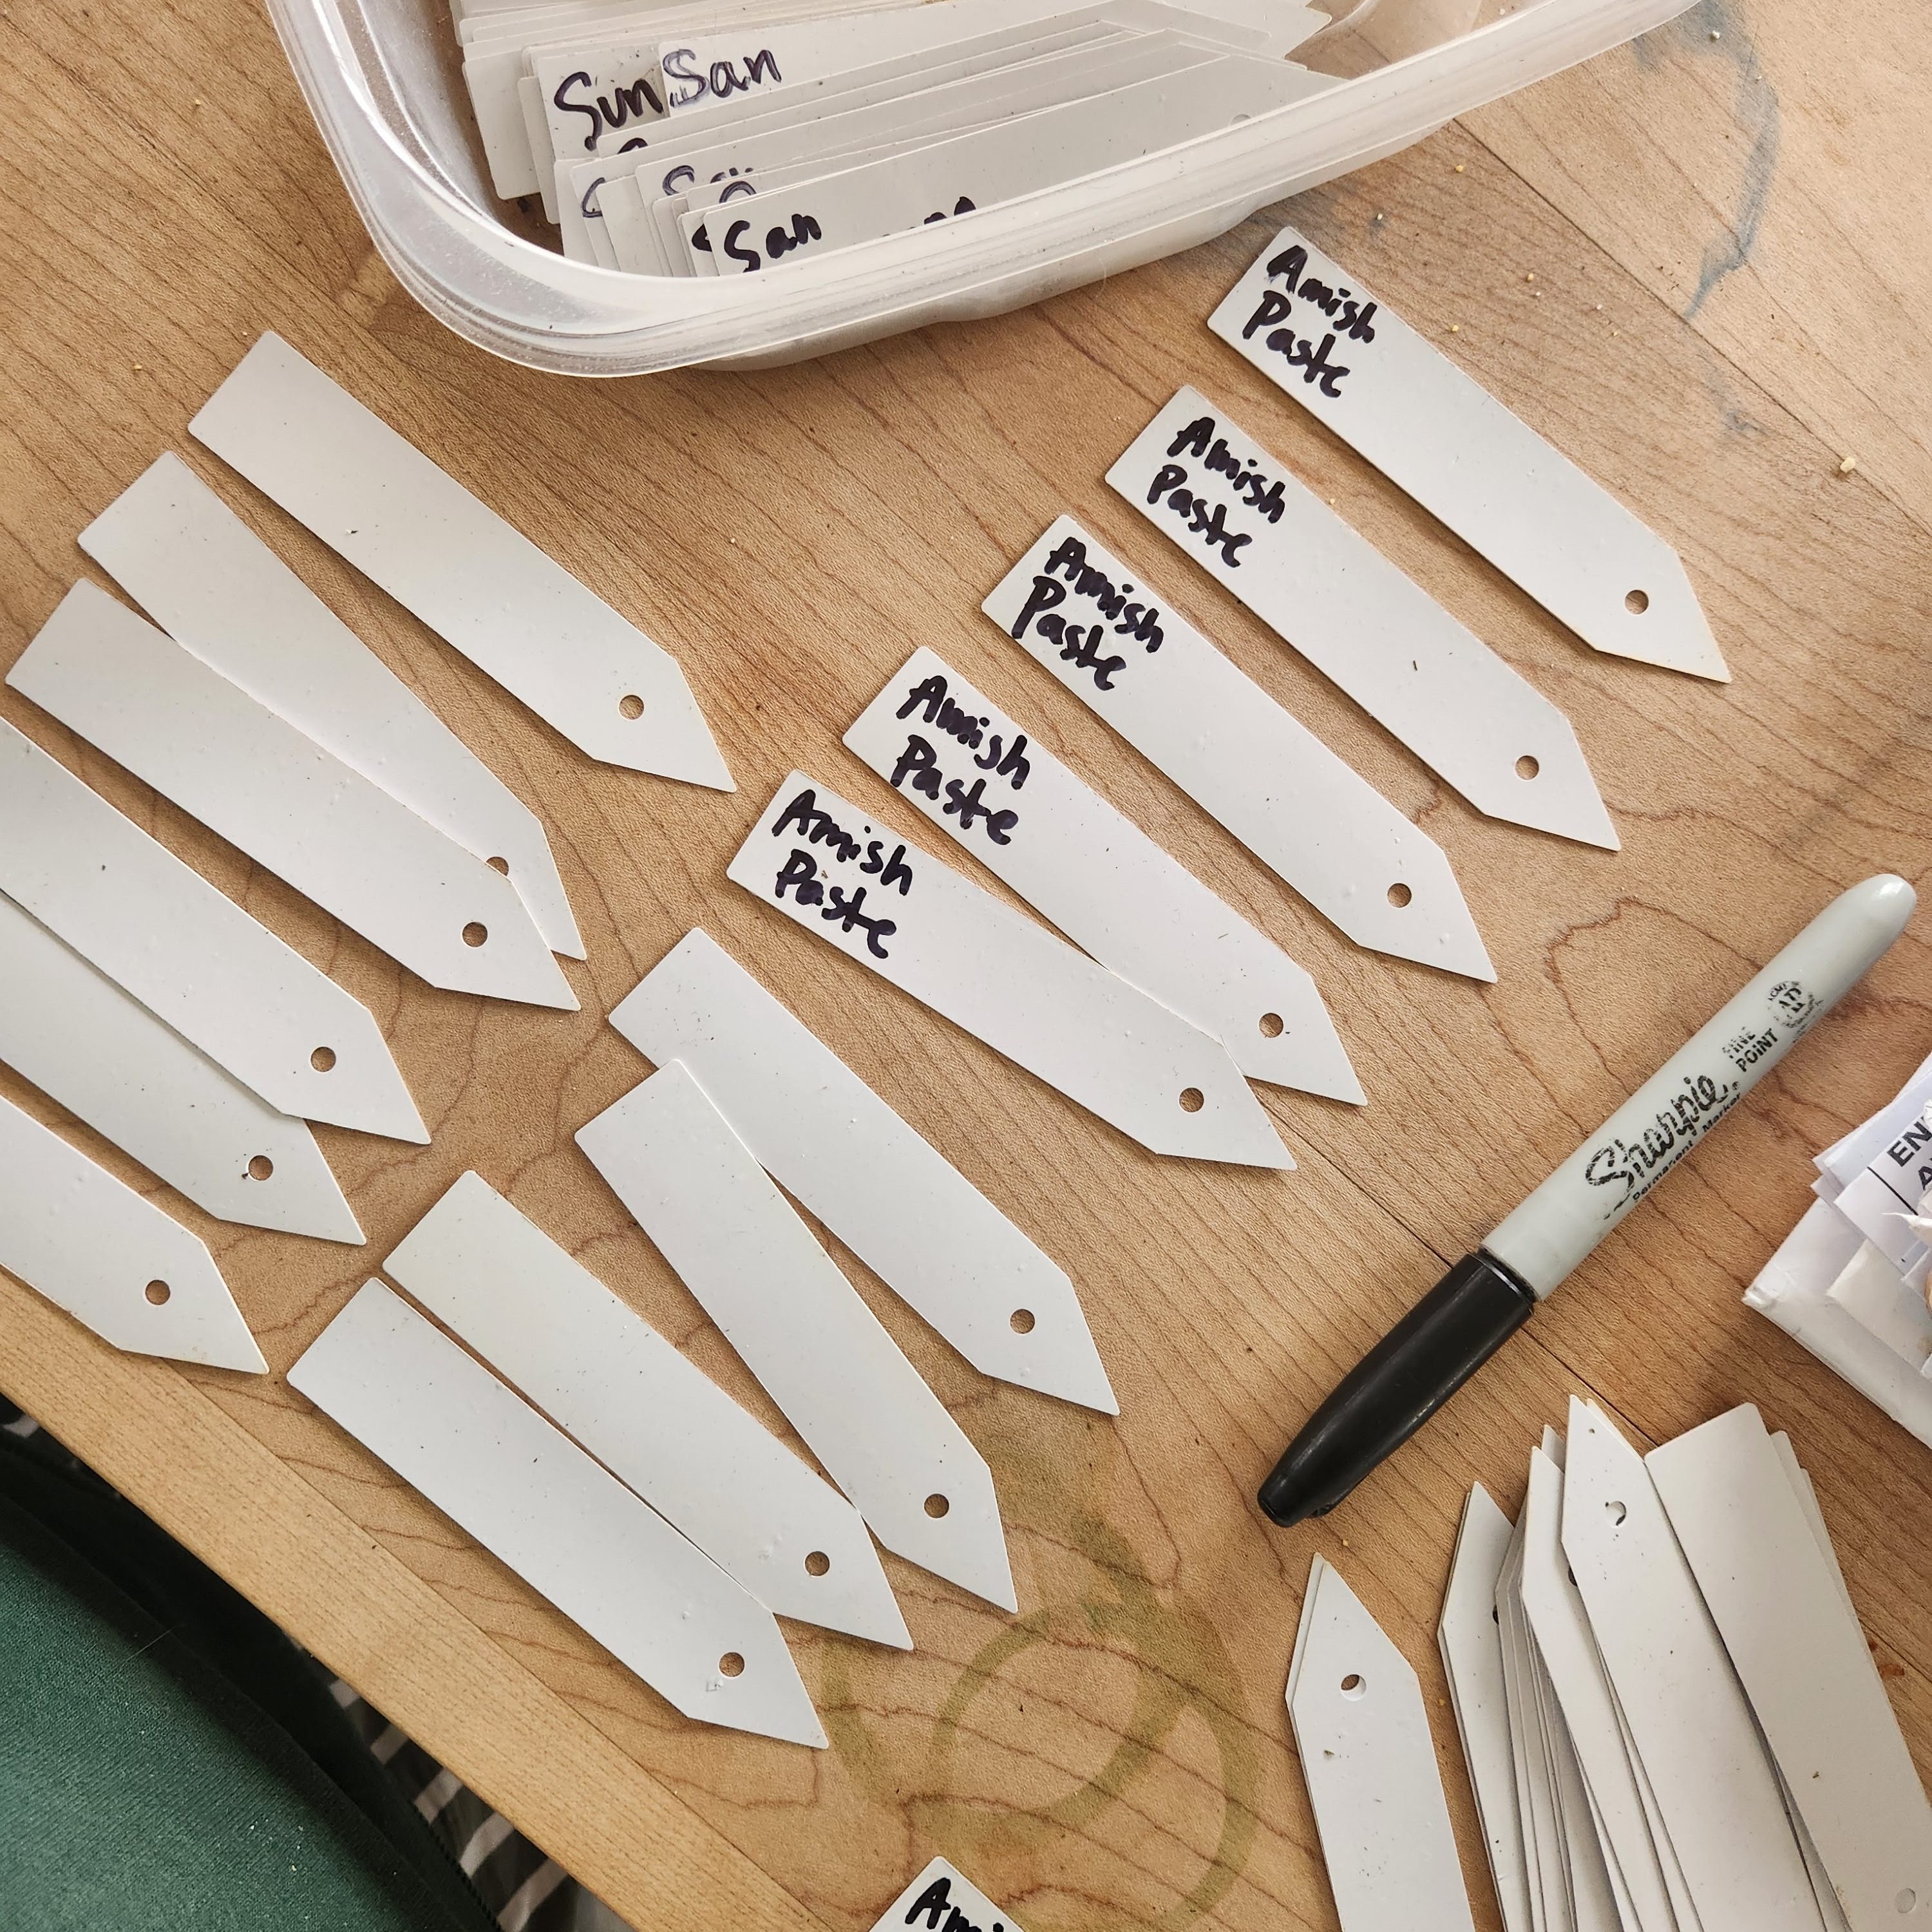
7. Labels and Markers
This is another one of those, “Do As I Say, Not As I Do” moments….
Label your containers or trays, and label them well! I have tried all kinds of ways of labeling: tape on the sides of trays, numbering rows and writing in a notebook, wood popsicle sticks that lets the marker bleed etc. Nothing beats getting a plastic tag with a sharpie marker! I have had too many “mystery” trays that I couldn’t sell in my farmstand, because I thought I could remember the varieties that were in there ~ and then immediately forgot. If you are concerned about plastics you can always wash and reuse them year after year.
8. Domes or Covers
Domes or some kind of plastic cover will offer you a greenhouse effect for humidity control while seeds are germinating. Remove the covers once the seedlings emerge, this will prevent moisture issues. Excess moisture from keeping domes on too long, or from overwatering after the plants emerge can cause issues like dampening off and mildew. Dampening of is when the stem of the plant actually breaks down and collapses at, or just below the soil line.
You can by humidity domes that fit those handy dandy 1020 trays, or you can come up with your own ideas. I have used the clear lids for the baking foil pans from the store. I have seen others cover trays with plastic wrap, anything that can create that greenhouse effect can help.
9. Tables or Shelving
Having a designated space for growing your seedlings is helpful, especially if it is something that can handle the dirt and water that are bound to be spilt on them in some fashion. My favorite shelving is the wire racking that can be found on Amazon. It is easy to clean, come in great sized for sliding cell tray flats in and out, the wire makes it easy to set up grow light and heat mat wiring etc. Just consider what you are using and if it is waterproof enough. Keeping things at a level that is easy to see and water will help you out during the busy spring season.
10. Seedling Fertilizer
Many people that are starting plants indoors ahead of the season, like to add extra seedling fertilizer. I personally have had luck with the potting mix above without needing to use much fertilizer since it has so many nutrients in the soil already. If you want to give plants and added boost, especially heavy feeders – or if it is going to be a while before they can be transplanted outside into rich garden soil, you will want to find a mild fertilizer.
Start with a mild, balanced fertilizer after the seedling develop their first true leaves. Then gradually increase the strength of the fertilizer as the plants continue to grow. One of my personal favorites is Trifecta+ from MIGardener, which is a Seed and Garden Supply company based out of Michigan.
Get Growing!
Armed with these essential supplies, your indoor seed starting journey is bound to get off to a successful start. Whether you’re growing blooms for the bee’s and yourself to enjoy, herbs or vegetables, providing the right environment from the start will help ensure that you will have robust and healthy seedlings that will share their abundance later in the season.
Happy Planting!

Leave a comment